Wednesday, November 28, 2012

Product Review: Trader Joe's Brownie Mix

Pin It Now!

I have always loved Trader Joe's. I love the exotic finds in their frozen foods section, all of their delicious dark chocolate-covered concoctions, and their Hawaiian shirts. I also love that they have off-beat foods that you won't find anywhere else. My only wish for Trader Joe's is that they carried more gluten free/dairy free options for people on special diets. Last time I was in the store I searched high and low trying to find some gluten free options to try, and much to my dismay the pickings were slim. I did, however, come across a gluten free brownie mix. Here are my thoughts...


Pros:


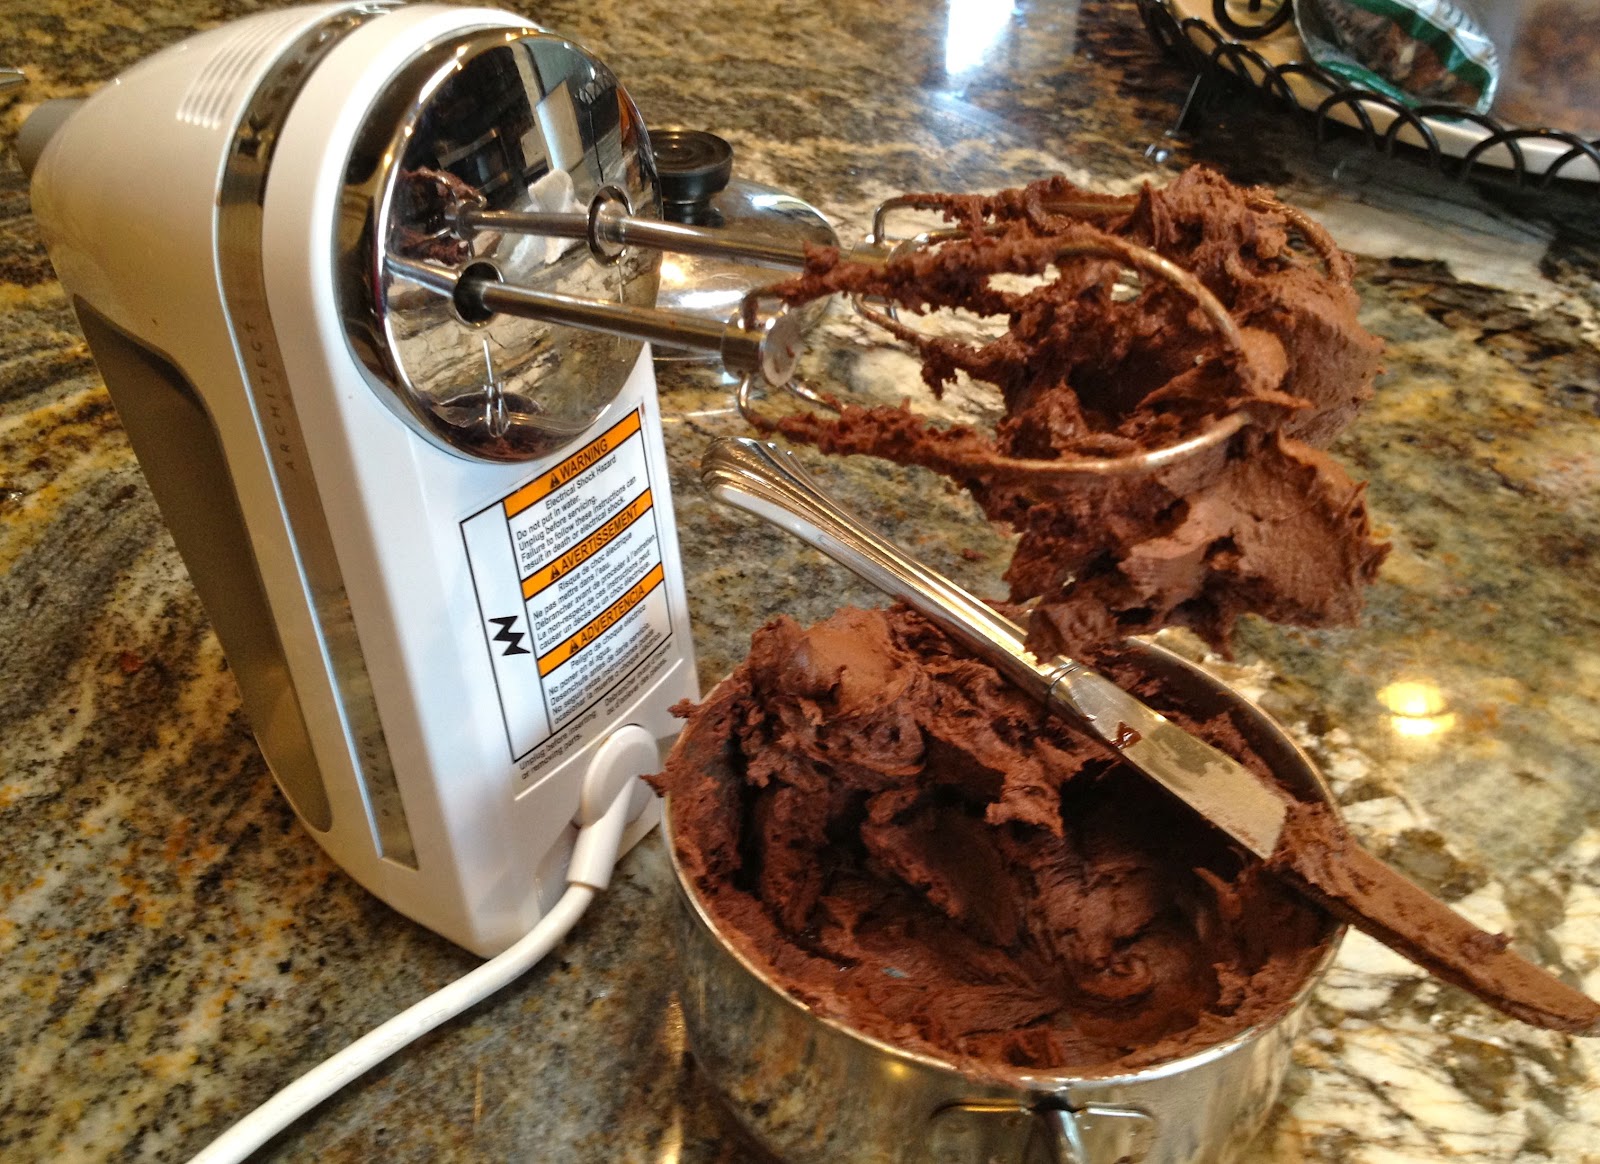
This mix is extremely easy to make. All you need to do is add an egg, water, and oil (I used canola oil). Then you mix everything together, pour it into a pan, and bake. I also added dairy free chocolate chips to make it a even more chocolatey. If you need a quick baked good for a bake sale or a potluck, this is a great option.

Not only are these brownies gluten free, but they are also dairy free. Another huge plus! 

The best part about this mix is that it tastes great! I made it for a dinner party I had at my house and I did not tell the guests it was gluten free because I wanted to see what they thought without knowing it was an alternative recipe. Everyone loved it! I was actually surprised at how good these brownies were. I was expecting them to taste somewhat off, as many gluten free recipes do. Luckily the brownies were a huge hit with my guests.


 Cons:


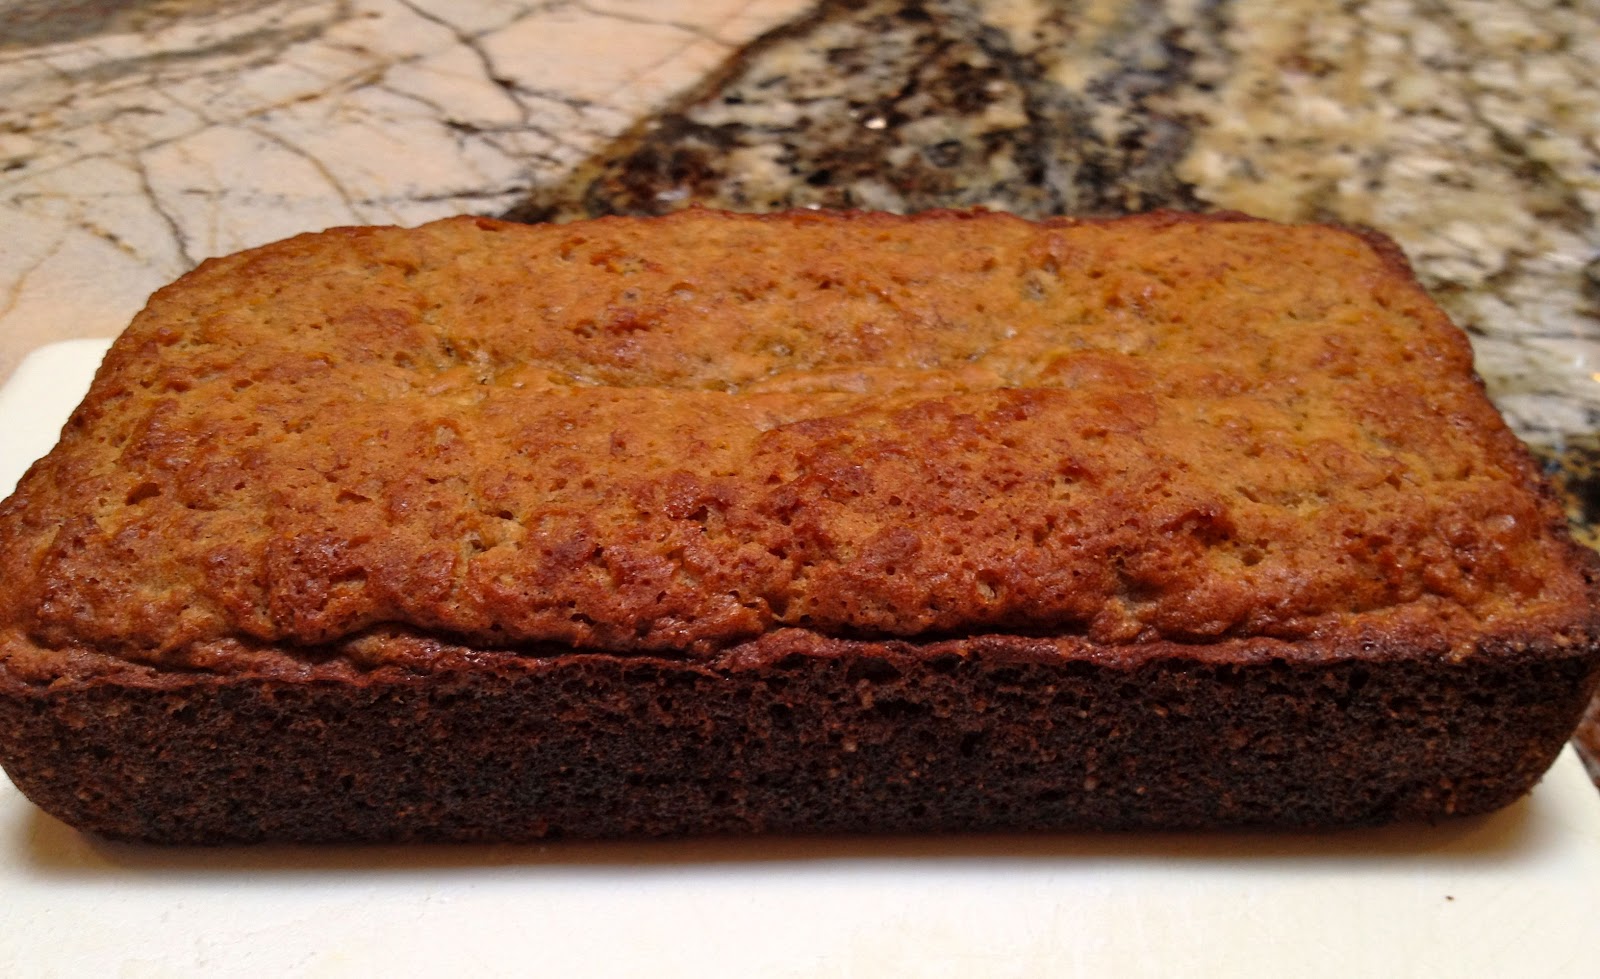
The brownies did not cook evenly for some reason. The outer edges got somewhat hard and crunchy, while the center was gooey and even a tad oily. It did not impact the taste necessarily, but I found it odd that the texture was so uneven after it baked.


This mix is not necessarily the most healthy gluten free dessert I have come across. It's definitely not Paleo (it has rice flours in it) and it has a lot of sugar in it.


Conclusion:


This is a tasty, quick dish to make in a pinch if you are craving some chocolate. However, I would not want to make this all the time just because I think I could find a healthier option. I will keep my eye out for gluten free brownie recipes made from scratch and post it if I find one!

Follow Me on Pinterest

Sunday, November 25, 2012

BBQ Turkey Burgers

Pin It Now!

This is a great recipe to make when you want a quick, tasty dinner. It's easy to make and takes very little prep time. I particularly wanted to share this recipe because of my new favorite sauce: Stubb's brand. In general I would caution you to be careful about the barbeque sauce that you use. Many are not gluten free, and others are loaded with sugar. But I love Stubb's because it's gluten free, low in sugar, and it tastes great! The company makes a whole line of BBQ sauce, marinades, and rubs. I have tried several of their flavors and I am a huge fan. This recipe is just one example of how you can make a delicious, simple dish with a yummy, gluten free sauce.


Ingredients


1 pound ground turkey
2 tablespoons Stubb's Original BBQ Sauce (or your favorite gluten free BBQ sauce)


Preparation


1. Add the BBQ sauce to the ground turkey and mix until well combined.
2. Form the turkey into 4 burger patties.
3. Cook the patties on the grill or on a pan on the stove until fully cooked (about 10-15 minutes). Make sure to flip the burgers while you cook them so that they cook evenly.  Note: unlike beef burgers where you can leave some pink in the middle, turkey burgers taste best when they are fully cooked through.


4. Top with your favorite condiments and serve!

I topped my burgers with lettuce, tomato, red onion, and spicy brown mustard. I ate mine without a bun because I wanted to go gluten free and I did not have any gluten free buns handy. Be creative and use any bread or bun that you like, or just eat it without a bun like I did. If you eat dairy, I think a piece of sharp cheddar cheese would be great on this burger. Enjoy!


Follow Me on Pinterest

Thursday, November 15, 2012

Recipe Review: Elana's Pantry Bread 2.0

Pin It Now!

I am still on my quest to find the best gluten free bread recipe. This week I tried Elana's Pantry Bread 2.0.  I enjoyed her Paleo Bread and thought I would give this one a try as well to compare the two.

Pros:


This bread is very easy to make, and just like the Paleo Bread, there is no need to knead the dough or let it rise. Simply mix the ingredients, pour into a loaf pan, and bake. It also does not require a food processor like the Paleo Bread does, so it's an even easier clean up.


Another benefit of this recipe is that, similar to the Paleo Bread, it only takes 30 minutes to bake, which saves you time if you don't have over an hour to wait for the bread to bake.

This bread tastes great! It has a slightly different texture and flavor as compared to normal whole wheat bread, but I enjoyed the flavor and so did my family members who tried it. 

Finally, this recipe is very healthy when you look at the ingredients. Anyone worried about not eating dairy, soy, gluten, potato starch, and butter will be very happy to see that this recipe contains none of those ingredients.


Cons:


The same problem exists with this recipe as I found with the Paleo Bread. The bread doesn't really rise, so it comes out rather short in a normal bread pan. As with the Paleo Bread, the recipe author recommends a special loaf pan which I do not have.  As a result, my bread came out about half the height of a normal slice of bread. This is not a huge deal but somewhat annoying if you want to use the bread to make a sandwich. I ended up making two mini sandwiches with my loaf, which was fine with me, but others may want to invest in the recommended loaf pan. If I end up buying it I will post my thoughts about using it.

Another downside of this recipe is that I could not find large quantities of arrowroot powder, a required ingredient, at my local grocery store. As a result, I had to buy 2 small containers of it so I would have enough for this recipe, which was a little more expensive than I would have liked. I did not try looking at a specialty store like Sprouts of Whole Foods because I did not have time this week, so it may be the case that you can buy it in bulk at those stores. Arrowroot powder is not an ingredient I have used in cooking before so I did not have it readily available in my pantry.

I also think this bread is not quite as healthy as the Paleo Bread. I love that the Paleo Bread has coconut flour and coconut oil. I think that is a great addition that is not commonly seen in bread recipes.


 Conclusion:


Overall, this is a very healthy and easy to make recipe that I think most gluten free people would think is a great substitute for normal bread. However, comparing it to Elana's Pantry Paleo Bread, I think the Paleo Bread is healthier and I would be more inclined to make it again in the future. 


Follow Me on Pinterest

Saturday, November 3, 2012

Tropical Smoothie

Pin It Now!

I love having smoothies for breakfast. They are easy to make and are a great way to jump start your day with some fruit and protein. This smoothie is naturally sweet because of the pineapple and the orange juice, so I did not add any extra sweetener. Feel free to add some honey or agave nectar if you want to make this smoothie even sweeter.

Ingredients

1 cup or orange juice
1 banana
several large chunks of pineapple
1 tablespoon of peanut butter
handful of ice
dash of xanthum gum (this is optional - it helps thicken the smoothie, but the smoothie will still taste great without it)


Preparation


Put all ingredients in a blender and blend until smooth. Garnish with a piece of pineapple and enjoy!


Follow Me on Pinterest

Wednesday, October 31, 2012

Recipe Remix: One-Pot Oktoberfeast

Pin It Now!

Whole Foods has some great recipes on its website. I have enjoyed trying many of their recipes in the past and will continue to use them in the future. I recently came across a recipe that looked delicious, but did not fit into my dietary requirements. Thus, welcome to my first recipe remix post, where I show what substitutions I used to make a recipe more aligned with my dietary needs.

One-Pot Oktoberfeast from Whole Foods is a great recipe for fall. It's a warm, savory comfort food that would be great to make for football tailgate or a German Oktoberfest party. The only problem: it contains dairy. You can see the original recipe by clicking here. Below, I will show you what ingredients I used to make this recipe dairy free.

Ingredients


1 tablespoon non-dairy butter (I used Earth Balance. You could also use olive oil)
1 package (12 ounces) The Original Brat Hans Original Bratwurst, cut into 2-inch chunks 
1 1/4 cup low-sodium chicken broth, divided 
2 teaspoons dried dill, divided 
1/4 teaspoon freshly ground black pepper 
1 yellow onion, chopped 
1 pound fresh button mushrooms, quartered 
3 tablespoons non-dairy sour cream (I used Tofutti Sour Supreme) 
3 tablespoons German mustard 
1 jar (32 ounces) sauerkraut, rinsed and drained 

Preparation


Melt the non-dairy butter in a large pot over medium-high heat. Add sausage and cook until browned, about 5 minutes. Add 1/4 cup broth, 1 teaspoon dill, pepper and onion and cook until onions are softened and golden, 6 to 8 minutes. Reduce heat to medium, add mushrooms and cook until they've released their juices, about 5 minutes more. In a small bowl, whisk together remaining 1 cup broth, non-dairy sour cream and mustard. Add to pot, along with sauerkraut; bring to a boil. Reduce heat to medium and simmer until fragrant and thickened, about 10 minutes more. Sprinkle with remaining dill and serve.


Follow Me on Pinterest

Sunday, October 21, 2012

Recipe Review: Bob's Red Mill GF Hearty Whole Grain Bread Mix

Pin It Now!

As I discussed in the previous post, I am on a mission to find a great go-to gluten free bread recipe. This post is more about a product than an actual recipe. Here, I am reviewing a gluten free baking mix from Bob's Red Mill, called Gluten Free Hearty Whole Grain Bread Mix. I saw this mix last time I was at the grocery store and I was tempted to try it because I thought it might be a tasty and easy way to enjoy some great gluten free bread. Here are my thoughts.


Pros:

All you need to make this recipe are the mix, warm water, oil (I used canola oil), cider vinegar, and 2 eggs. It is nice to just buy the mix instead of having to buy multiple types of gluten free flours and other ingredients. Here, all the dry ingredients are prepared ahead of time so there is less to buy and less measuring of ingredients. The yeast is even included inside the bag so you don't need to buy a packet of yeast.

This mix makes a very nice-sized loaf. It fills a regular 9 x 5 inch loaf pan and rises nicely. The slices come out about the same size as regular wheat bread that you would buy at the store. The bread is also hearty and thick, with a nutty and somewhat bitter flavor, similar to pumpernickel bread.

Cons:

This bread takes some time to make. It contains yeast and needs time to rise, so when you include the mixing time, rising time, and baking time, you are looking at over 2 hours before it's ready to eat. It's not something you can whip up in 40 minutes.


This bread has a lot of ingredients, which makes it taste good, but also means that there might be some ingredients that you wish were left out. For example, someone following a strict Paleo diet would probably not be able to eat this bread because it has bean flour, buckwheat flour, and potato starch in it. However, if you are just eating gluten free and are not sensitive to any other types of grains or beans, this bread is a great option.

Conclusion:

Overall, I like to make things from scratch. It's a personal preference, but I like to control the ingredients and know exactly what I am eating. Further, I would like to find a bread that takes less time to make. On the other hand, this bread tastes great and is the perfect sized loaf to have at least a week's worth of sandwiches and toast. I would probably not make this bread every week, but it is a nice treat to make once in a while because it tastes great and has a true "bread" consistency. It does a great job of tricking you into thinking you are eating the real thing!

Follow Me on Pinterest

Friday, October 19, 2012

Recipe Review: Elana's Pantry Paleo Bread

Pin It Now!

Starting out on a new gluten free diet isn't always easy. There are so many things you used to eat, probably everyday, that you simply can't eat anymore. One of those things is bread made with wheat. There are gluten free breads you can buy from the store, but sometimes they have ingredients you don't want, such as preservatives, dairy, refined sugar, or alternative flours that you don't care for. It can be difficult to find a suitable alternative to wheat bread that still meets your other diet requirements.

The problem is that even when you are on a special diet, sometimes you just want a sandwich or a piece of toast. So how do you find a way to have gluten free bread that meets your needs? I am on a mission to find a go-to gluten free bread recipe that will satisfy my own bread cravings.

The first recipe I tried is the Paleo Bread recipe from Elana's Pantry. For this post, I am going to do a review of my thoughts on this recipe. If you would like to try it, you can find the recipe here. When I tried this bread, I did my best to follow the recipe exactly.

Pros:

This recipe is extremely easy to make. You basically just dump all the ingredients in a food processor, pour the batter into a loaf pan, and bake.

 
It's also a quick recipe to make. There is no waiting for the bread to rise and it only takes 30 minutes to bake.

This bread also has a very healthy list of ingredients, which is the best and most important part about it. I will be amazed if I can find a healthier recipe than this concoction of almond flour, coconut flour, flaxseed and eggs.


Cons:

Because this bread is not designed to rise, a very specific sized loaf pan is required to make this bread and have it be a normal size. (When you read the recipe, you will see that the author recommends a particular pan you can buy from Amazon). I did not have the proper size pan, so my bread turned out somewhat short and flat. It would be difficult to make a good sandwich with my bread because the slices were too short. If I decided that I was going to make this bread a lot, I would probably end up getting the special loaf pan recommended in the recipe with the hope that the slices would be taller.


Conclusion:

Not only was this bread super healthy, but it also tasted great. It did not taste like any type of bread I have had before, but it had a delicious nutty flavor to it that I think would taste great with any type of sandwich or as peanut butter toast. I would recommend trying this recipe. I liked it a lot and am strongly considering getting the special loaf pan so that next time I make it the bread comes out perfect.

Follow Me on Pinterest

Friday, October 12, 2012

Pizza Omelet

Pin It Now!

I recently shared my recipe for gluten free pizza. Pizza is one of my favorite foods, and after I made the pizza recipe, I had some leftover ingredients. I needed to throw together a quick breakfast, and I thought, what better than a pizza-flavored omelet? You can enjoy delicious Italian flavors even at breakfast :-)

Ingredients


3 eggs
garlic powder
salt
pepper
diced tomato
black olives
pepperoni
dairy free mozarella cheese (I used Daiya)
chopped fresh basil


Preparation


1.  Use a whisk to scramble 3 eggs in a medium-sized bowl. Add salt, pepper, and garlic powder to taste. Add the tomato, pepperoni, and olives to the egg mixture.
2. Spray a small skillet with cooking spray. Set the skillet on the stove over medium heat.  Pour the egg mixture into the skillet.
3. Stir the eggs frequently as they cook.


4. Once the eggs are cooked, put them on a plate and top with dairy free cheese and fresh basil. Enjoy!


Follow Me on Pinterest

Sunday, October 7, 2012

Dairy Free Basil Mozzarella Pizza

Pin It Now!

Pizza is something that is hard to find a substitute for when you are not eating dairy. I found a good brand of dairy free cheese that I used to make this recipe. If you want to make gluten free/dairy free pizza, try making this pizza recipe with my Gluten Free/Vegan Pizza Crust.

Ingredients

Your favorite low sodium or no salt added tomato sauce
Mozzarella-style dairy free cheese (my favorite brand is Daiya. I get mine at Sprouts but I have also seen it at Whole Foods).
Pepperoni (or leave off the pepperoni if you want your pizza to be vegetarian or vegan)
Black olives
Fresh basil
Dash of garlic powder
Dash of dried Italian Seasonings

Preparation

1. Preheat the oven to 350 degrees.
2. Add the tomato sauce to a pre-baked pizza crust. (Try my Gluten Free/Vegan Pizza Crust recipe!)
3. Cover the sauce with the non-dairy cheese, pepperoni, and black olives.


4. Sprinkle some garlic powder and Italian Seasonings on top of the pizza along with some thinly sliced pieces of fresh basil.
5. Bake the pizza for 10-15 minutes or until all the cheese is melted and the crust is golden brown.


There are many other gluten free pizza crust recipes out there that you could try if my almond flour version is not for you. I am a big fan of this Wheat-Free Vegan crust by Bethenny Frankel, which is made with oat flour. I have also come across pizza crusts made with coconut flour, such as this Paleo Pizza recipe. I have not made the Paleo recipe but I hope to try it sometime soon. There are so many options out there for making gluten free crust. Keep trying new ones until you find what is right for you!

Follow Me on Pinterest

Saturday, October 6, 2012

Gluten Free/Vegan Pizza Crust

Pin It Now!

One of the foods I miss the most when not eating gluten is pizza. It's the ultimate comfort food and it it's the food of choice on many occasions. It's not always easy to be in a social environment watching others enjoy pizza when you are not eating it. I was so excited to come up with a gluten free pizza crust option that was easy to make at home and would satisfy my pizza craving. I hope you like it!

Ingredients

Serves 3-4. 

2 cups almond flour
1/2 teaspoon salt
1/2 teaspoon pepper
1 teaspoon Italian Seasoning (or your favorite dried Italian herbs, such as oregano or basil)
1 tablespoon agave nectar (this is optional - I like a little sweetness in my pizza crust, but feel free to leave this out if you don't)
2 teaspoons garlic powder
2 tablespoons olive oil
1/2 teaspoon baking soda
1/4 cup water

Preparation

1. Preheat oven to 350 degrees.
2. Combine all ingredients in a mixing bowl and mix well until the dough forms.
3. Put the dough on a piece of parchment paper and roll into a ball. Put another piece of parchment paper on top of the dough and use a rolling pin to roll out the dough in between the two pieces of parchment paper. (I like to roll my dough into a square or rectangle because I find that to be easier than trying to roll it in a circle, plus it fits on the cookie sheet better).
4. Spray a cookie sheet with cooking spray.
5. Take the top piece of parchment paper off the dough. Flip the bottom piece of parchment paper upside-down over the cookie sheet so that the pizza dough drops down onto the center of the cookie sheet.


 6. Put the cookie sheet in the oven and bake for 10-15 minutes, or until the edges of the dough start to turn golden brown.


Use this dough to make my Dairy Free Basil Mozzarella Pizza, or add your own favorite toppings and enjoy!


Follow Me on Pinterest

Tuesday, October 2, 2012

Mint Chocolate Cupcakes

Pin It Now!

I love mint chocolate. I mean, I REALLY love mint chocolate. Thin Mints, mint chip ice cream, York Peppermint Patties.... the list goes on and on. I also love cupcakes. Who doesn't, right? Baking cupcakes is so much fun because there are endless options for flavors, colors, frosting styles, and presentation. Unfortunately, it's not easy to find delicious mint chocolate-flavored treats or cupcakes when you're watching your gluten and/or dairy intake. Luckily, with a little help from Elana's Pantry, I have found a way to indulge in my love of mint chocolate (and cupcakes!) in a much healthier way.

Mint Chocolate Cupcakes

The recipe below is based on the Chocolate Cake recipe from "The Gluten-Free Almond Flour Cookbook" by Elana Amsterdam. This recipe makes about 16 cupcakes.

Ingredients


2 cups blanched almond flour (my favorite is from Honeyville Farms)
1/4 cup unsweetened cocoa powder
1/2 teaspoon salt
1/2 teaspoon baking soda
1 cup agave nectar
2 large eggs
1 tablespoon vanilla extract
1/2 teaspoon peppermint extract

Preparation


1. Preheat the oven to 350.  Line a cupcake pan with cupcake liners.
2. Combine all the dry ingredients in a bowl and mix well.
3. Combine the wet ingredients in a separate bowl, mix well, and combine with the dry ingredients.


4. Using a small spoon, scoop the batter into the cupcake pan, filling each cupcake liner half-way with batter. 
5. Put the cupcake pan in the oven and bake 15-18 minutes, until a toothpick inserted into one of the center cupcakes comes out clean. While your cupcakes are baking and cooling, make the frosting (recipe below).
6. Remove the cupcakes from the oven and allow them to cool in the pan.
7. Once the cupcakes are cool, use a spoon to pop the cupcakes out of the pan.


Mint Chocolate Frosting

The following recipe is based on the Vegan Chocolate Frosting recipe from Elana's Pantry. It does not make a ton of frosting, just enough for a thin layer of frosting over 16 cupcakes. If you like using a lot of frosting on cupcakes, consider making a larger batch of this frosting.

Ingredients


1 cup dairy free chocolate chips (many times dark chocolate chips are dairy free. You can also find dairy free chocolate chips at most grocery stores).
1/2 cup grapeseed oil
2 tablespoons agave nectar
1 tablespoon vanilla extract
1/4 teaspoon peppermint extract
pinch of salt


Preparation


1. In a small saucepan over very low heat, melt chocolate and grapeseed oil.
2. Stir in agave, vanilla, peppermint extract, and salt.
3. Put frosting in the freezer for 15-30 minutes to chill and thicken.
4. Remove from the freezer and whip the frosting with a hand blender until it is thick and fluffy.


5. Frost your cupcakes! For the cupcakes you see in the picture below, I used a Wilton 1M tip to frost. You could also frost them the old-fashioned way with a spatula. Get creative and make some delicious, beautiful, and healthier cupcakes!


Follow Me on Pinterest

Sunday, September 30, 2012

Best Banana Bread

Pin It Now!

My grandmother makes the most delicious banana bread, and I never thought I would ever find a recipe that would come close, especially one that was gluten free and dairy free. Luckily for me, this recipe by Bethenny Frankel gives my grandmother's banana bread a run for its money. I have re-printed Bethenny's recipe below, with some of my own notes added in.

Ingredients


1 cup raw sugar (also known as turbinado sugar)
1 cup oat flour ( such as Bob's Red Mill, or Bob’s Red Mill Gluten Free Flour. I prefer oat flour for this recipe but either type will work. You can also make your own oat flour by putting oatmeal in a food processor.)
¾ teaspoon baking powder
½ teaspoon baking soda
¼ teaspoon salt
1 cup mashed over ripe bananas (2 or 3)
1 tablespoon nondairy butter (softened)
1 egg
1 teaspoon real vanilla extract
(Bethenny's recipe calls for chocolate chips. I left that out of my recipe but I'm sure it would be delicious with the chocolate chips added in).


Preparation


1. Preheat the oven to 350 degrees.  
2. Combine the dry ingredients in a bowl and mix. 


3. Combine the wet ingredients (including the bananas) in a separate bowl and mix until well combined.


4. Combine the dry and wet ingredients in a single bowl and mix well.
5. Cut a piece of parchment paper to fit the bottom of a loaf pan. Put the parchment paper in the bottom of the pan and spray it with cooking spray.
6. Pour the batter into the loaf pan and cover it loosely with foil.
7. Bake for 30 minutes on the middle rack of the oven.
8. Remove foil, then bake for another 20 minutes, or until a toothpick inserted in the middle comes out almost clean (moist crumbs are fine).


9. Cool completely, then slice and serve.


Follow Me on Pinterest

Wednesday, September 26, 2012

Basil Roast Turkey Breast

Pin It Now!

Turkey is not just for Thanksgiving! You can enjoy a good roast turkey any time of year and experiment with many different flavors. I created this recipe using basil because that was the herb I had on hand, but I think other herbs such as rosemary or thyme would also be delicious. You could even try mixing a few different types of herbs for a more unique flavor.

Ingredients


1 whole bone-in turkey breast, 6-7 pounds
2 small onions
2 cloves of garlic
4-5 fresh basil leaves
2 tablespoons olive oil

Preparation 


1.  Preheat the oven to 450 degrees.
2. Chop the two onions into a few large pieces. Smash the two cloves of garlic with the side of a large knife. Set aside.
 3. Remove the turkey giblets and discard. Rinse the turkey with cool water and pat dry with a paper towel.
4. Salt and pepper the inside of the turkey cavity. Stuff 2-3 basil leaves, one of the smashed garlic cloves, and half of the onion inside the turkey.
5.  Spread the rest of the onions, garlic, and basil leaves out over the bottom of a baking pan. Set the stuffed turkey on the bed of onions and basil.


6. Using a basting brush, cover the entire outside skin of the turkey with olive oil. Salt and pepper the outside of the turkey.
7. Cover the turkey loosely with foil and put in the oven for 15 minutes.
8. Remove the foil and turn the oven down to 325 degrees. Continue cooking the turkey until the skin is golden brown and the internal temperature reaches 165 degrees when a meat thermometer is inserted into the thickest part of the breast. (Generally the total cook time should be 20 minutes per pound. For my 6.33 pound turkey, I cooked it for 2 hours and 5 minutes.).
9. Remove from the oven, cover with foil and allow to cool for 15-20 minutes. Carve and serve.


Follow Me on Pinterest

Tuesday, September 25, 2012

Three Bean Chicken Chili

Pin It Now!

Chili is one of my favorite comfort foods, especially in the fall and winter. What is better than coming home after a cold day to a warm pot of chili simmering in the crock pot? Try this recipe for a lighter version that skips the red meat and cheese but still has all the flavor of regular chili.

Ingredients


1 8oz can of tomato sauce
2 14oz cans diced tomatoes
1 4oz can diced green chillies
1 16oz can pinto beans
1 16oz can black beans
1 16oz can kidney beans
10oz package of frozen corn
1 onion, chopped
2 cloves of garlic, minced
1 jalapeno pepper, finely chopped (make sure you wear gloves while chopping peppers!)
1 tablespoon cumin
1 tablespoon smoked paprika
1 tablespoon dried mustard
1 teaspoon salt
1 tablespoon Worcestershire sauce
3 large boneless, skinless chicken breasts

Avocado & cilantro for garnish


Preparation


1. Add all of the canned tomatoes and the green chillies to the crock pot.
2. Drain and rinse all of the canned beans, then add them to the crock pot.
3. Add the frozen corn, onion, jalapeno, and garlic to the crock pot. Stir all the ingredients to combine.    (Note: I did not put any jalapeno seeds into my chili, but if you want a little more kick, try adding the seeds).
4. Add all the spices & the Worcestershire sauce to the crock pot and stir until all the ingredients are well mixed.


5. Place the three chicken breasts on top of the bean mixture. Cover and cook on high for 6 hours (or on low for 10 hours).
6. Remove the chicken breasts, shred them, and return the shredded chicken to the crock pot. Stir the chicken into the bean mixture. Cover and cook on high for another 30 minutes.


7. Serve the chili in bowls, topped with chopped fresh parsley.

I love adding cheese to my chili, but since I am eating diary free I have had to come up with an alternative. I added smashed avocado to my bowl of chili instead of cheese because avocado is a neutral flavor that cuts some of the spicy flavor, the same way cheese or sour cream does. You could also try adding dairy free cheese, or some crunched up tortilla chips to give your chili a little crunch. Enjoy!


Follow Me on Pinterest

Friday, September 21, 2012

Turkey Meatballs with Spaghetti Squash

Pin It Now!

Spaghetti squash is one of my new favorite foods. I love experimenting with new ways to prepare it. It's a great substitute for pasta in Italian recipes that is gluten free and lower in calories. For this recipe, I chose to bake it in the over, but it can also be boiled or cooked in the microwave.

The turkey meatballs that I made for this recipe are stuffed with goat cheese, which adds great flavor. However, if you are following a dairy free diet that does not allow for goat cheese, feel free to it leave out and the meatballs will still come out great!

Note: This recipe makes 40 meatballs and feeds 6-7 people. If you cut it in half it would feed 3-4 people.

For the Spaghetti Squash


Ingredients


1 large spaghetti squash


Preparation

1. Preheat the oven to 375.
2. Prick the squash all over with a fork to allow steam to escape while it's baking and prevent it from exploding in the oven.
3. Place the squash in the oven on the middle rack.
4. Bake for 1 hour
5. Remove and allow to cool until the skin of the squash is cool enough to handle.
6. Using a large knife, cut the squash in half lengthwise.


7. Scoop out the seeds and discard.
8. Use a fork to pull out the pulp of the squash. The pulp will come out in thin strands that resemble spaghetti.
9. Put the pulp of the squash in a bowl. Cover and keep warm while you make the meatballs. Discard the skins.

Note: You could also make the squash a day or 2 ahead, keep it in the fridge, and warm it up right before you are ready to serve the meatballs.


For the Turkey Meatballs


Ingredients


2 pounds of ground turkey
1 tablespoon olive oil
2 small yellow onions (or 1 large yellow onion)
1 large yellow bell pepper
3 cloves of garlic
1 medium-sized zuchinni
1/4 cup gluten free flour (I used Bob's Red Mill GF All Purpose Baking Flour but you could also use oat flour)
2 teaspoons of salt
2 teaspoons of Italian Seasoning (or your favorite dried Italian herb, such as oregano or basil)
2 eggs
4oz goat cheese
1 jar of your favorite low-sodium pasta sauce

Preparation


1. Preheat the oven to 350.
2. Using a food processor, finely chop the onion and yellow bell pepper. (You can also chop by hand but I like to use a food processor to make the chopping easier).
3. Pour the olive oil into a large sautee pan and add the onions and bell pepper. Cook for about 5 minutes, then add the garlic and continue to cook until the onions are translucent. Remove from heat and set aside.

 
4. While the onion and pepper is cooking, put the zucchini in the food processor and pulse until finely chopped. Pour in the gluten free flour and process until the mixture is smooth.
5. Put all the ground turkey in a large bowl. Add the onion mixture and the zucchini mixture. Add the salt, Italian Seasoning and eggs. Mix all ingredients together until combined.


6. Spray a cookie sheet with cooking spray.
7. Form the turkey mixture into 2-inch balls and place on the cookie sheet.
8. Using your index finger, make a small imprint in the top of each meatball. Fill the imprint with a small amount of goat cheese.


 9. Put the meatballs in the oven and bake for 15-18 minutes, or until the turkey is fully cooked.
10.  While the meatballs are cooking, warm up the tomato sauce in the microwave or on a sauce pan on the stove.
11. Serve the meatballs over spaghetti squash, topped with pasta sauce. You could also add Parmesan cheese if you like.


 Enjoy this dish next time you are craving Italian food!


Follow Me on Pinterest

Thursday, September 20, 2012

Buffalo Chicken in the Crock Pot

Pin It Now!

This recipe is inspired by the Crock Pot Buffalo Chicken Lettuce Wraps from Skinnytaste. Skinnytaste is a great site to check out for quick, simple, healthy recipes. I especially love the crock pot recipes. I have tried many of them and they are all delicious.

This is a great gluten free and dairy free fall recipe that you can make and share on football Saturday at a tailgate or at home. All football fans will love it! I made this for dinner last night and my brother liked it so much that when he came back for seconds he stood at the kitchen counter to eat without taking the time to sit down. I took that as a compliment. :-)

Ingredients


2 large boneless, skinless chicken breasts
1 32oz package low sodium chicken broth
1 medium onion, chopped
1 stalk of celery
2 cloves of garlic, diced
1/2 cup Frank's Original Red Hot Cayenne Pepper Sauce (or your favorite hot sauce)


Preparation


1. Place the two uncooked chicken breasts along with the onion, celery stalk, and garlic in the crock pot. Pour all the chicken broth over the chicken and vegetables.
2. Put the lid on the crock pot and cook on high for 4 hours.


3.  After 4 hours, remove the chicken breasts from the crock pot and shred the chicken with a knife and fork.
4. Save 1/2 cup of broth from the crock pot and discard the rest of the broth.
5. Put the chicken back in the crock pot and pour the 1/2 cup of saved broth over the chicken.
6.  Pour 1/2 cup of hot sauce over the chicken and stir until all the chicken is coated with sauce.
7. Cover and cook on high for another 30 minutes. Serve warm.


I turned my chicken into salads, serving the chicken over lettuce with avocado and Daiya Dairy Free Pepperjack Cheese on top.

You could also serve the chicken in corn tortillas or on gluten free bread with dairy free cheese (or regular cheese) and lettuce.

Enjoy and happy fall!


Follow Me on Pinterest

Wednesday, September 19, 2012

Amazing Chocolate Chip Cookies

Pin It Now!

I have mentioned Elana's Pantry on this blog once before, and I am so excited to share my favorite recipe from her site: Chocolate Chip Cookies that are gluten free, dairy free, and vegan! You will be truly amazed at how delicious these cookies are. In fact, I have had people tell me that these cookies are better than traditional chocolate chip cookies. Try these next time you want to make cookies, you will not be disappointed!

Ingredients


2 1/2 cups blanched almond flour
1/2 teaspoon salt
1/2 teaspoon baking soda
1/2 cup grapeseed oil
1 tablespoon vanilla extract
1/2 cup agave nectar
1 cup dairy free chocolate chips (I prefer dark chocolate but any type of dairy free chips will work)

Preparation


My favorite type of almond flour is from Honeyville Farms. However, if you can't get a hold of the Honeyville brand, Bob's Red Mill also makes almond flour and you can usually find it at your local grocery store. I have found that the Bob's Red Mill brand is not as finely ground and makes for a more textured cookie, but either brand will make a delicious cookie.


  1. Combine dry ingredients in a large bowl
  2. Stir together wet ingredients in a smaller bowl
  3. Mix wet ingredients into dry

  1. Form 1-inch balls and press onto a parchment paper lined baking sheet 
  2. Bake at 350° for 7-10 minutes
  3. Cool and serve


Makes 24 cookies. 


Note: I tried doubling this recipe and the cookies came out a little too greasy, probably because of the oil used. If you want to make a double batch, I would suggest making two single batches separately from each other. In my experience, some recipes don't work well when they are doubled, and this appears to be one of them. Other than that, this is an awesome recipe, I know you will love it!


Follow Me on Pinterest